The application shell pattern, or app shell, provides a way to build a Progressive Web App in a consistent way and allows it to instantly load on the users screen, similar to what you would expect from a native application.
In fact this pattern originated in the world of windows desktop application development and it only recently transferred to the web. I actually learned about it back in 2007 when Microsoft first introduced the Prism framework for WPF applications and still use it today.
The main idea encapsulated in this pattern is that the app shell provides a skeleton for the app that loads instantly and once it is loaded it will load other capabilities into itself dynamically.
In a web app context, this skeleton provides the minimal HTML, CSS and Javascript that needs to be rendered by the browser to make the app somewhat usefull. Very often this includes a header, a footer, the navigation structure and some placeholders.
Once the initial skeleton is rendered, the rest of the app is loaded asynchronously and positioned into it using javascript.
Infrastructure shell
The app will need some client side infrastructure code to allow loading the different capabilities into it. I refer to this code as the infrastructure shell.
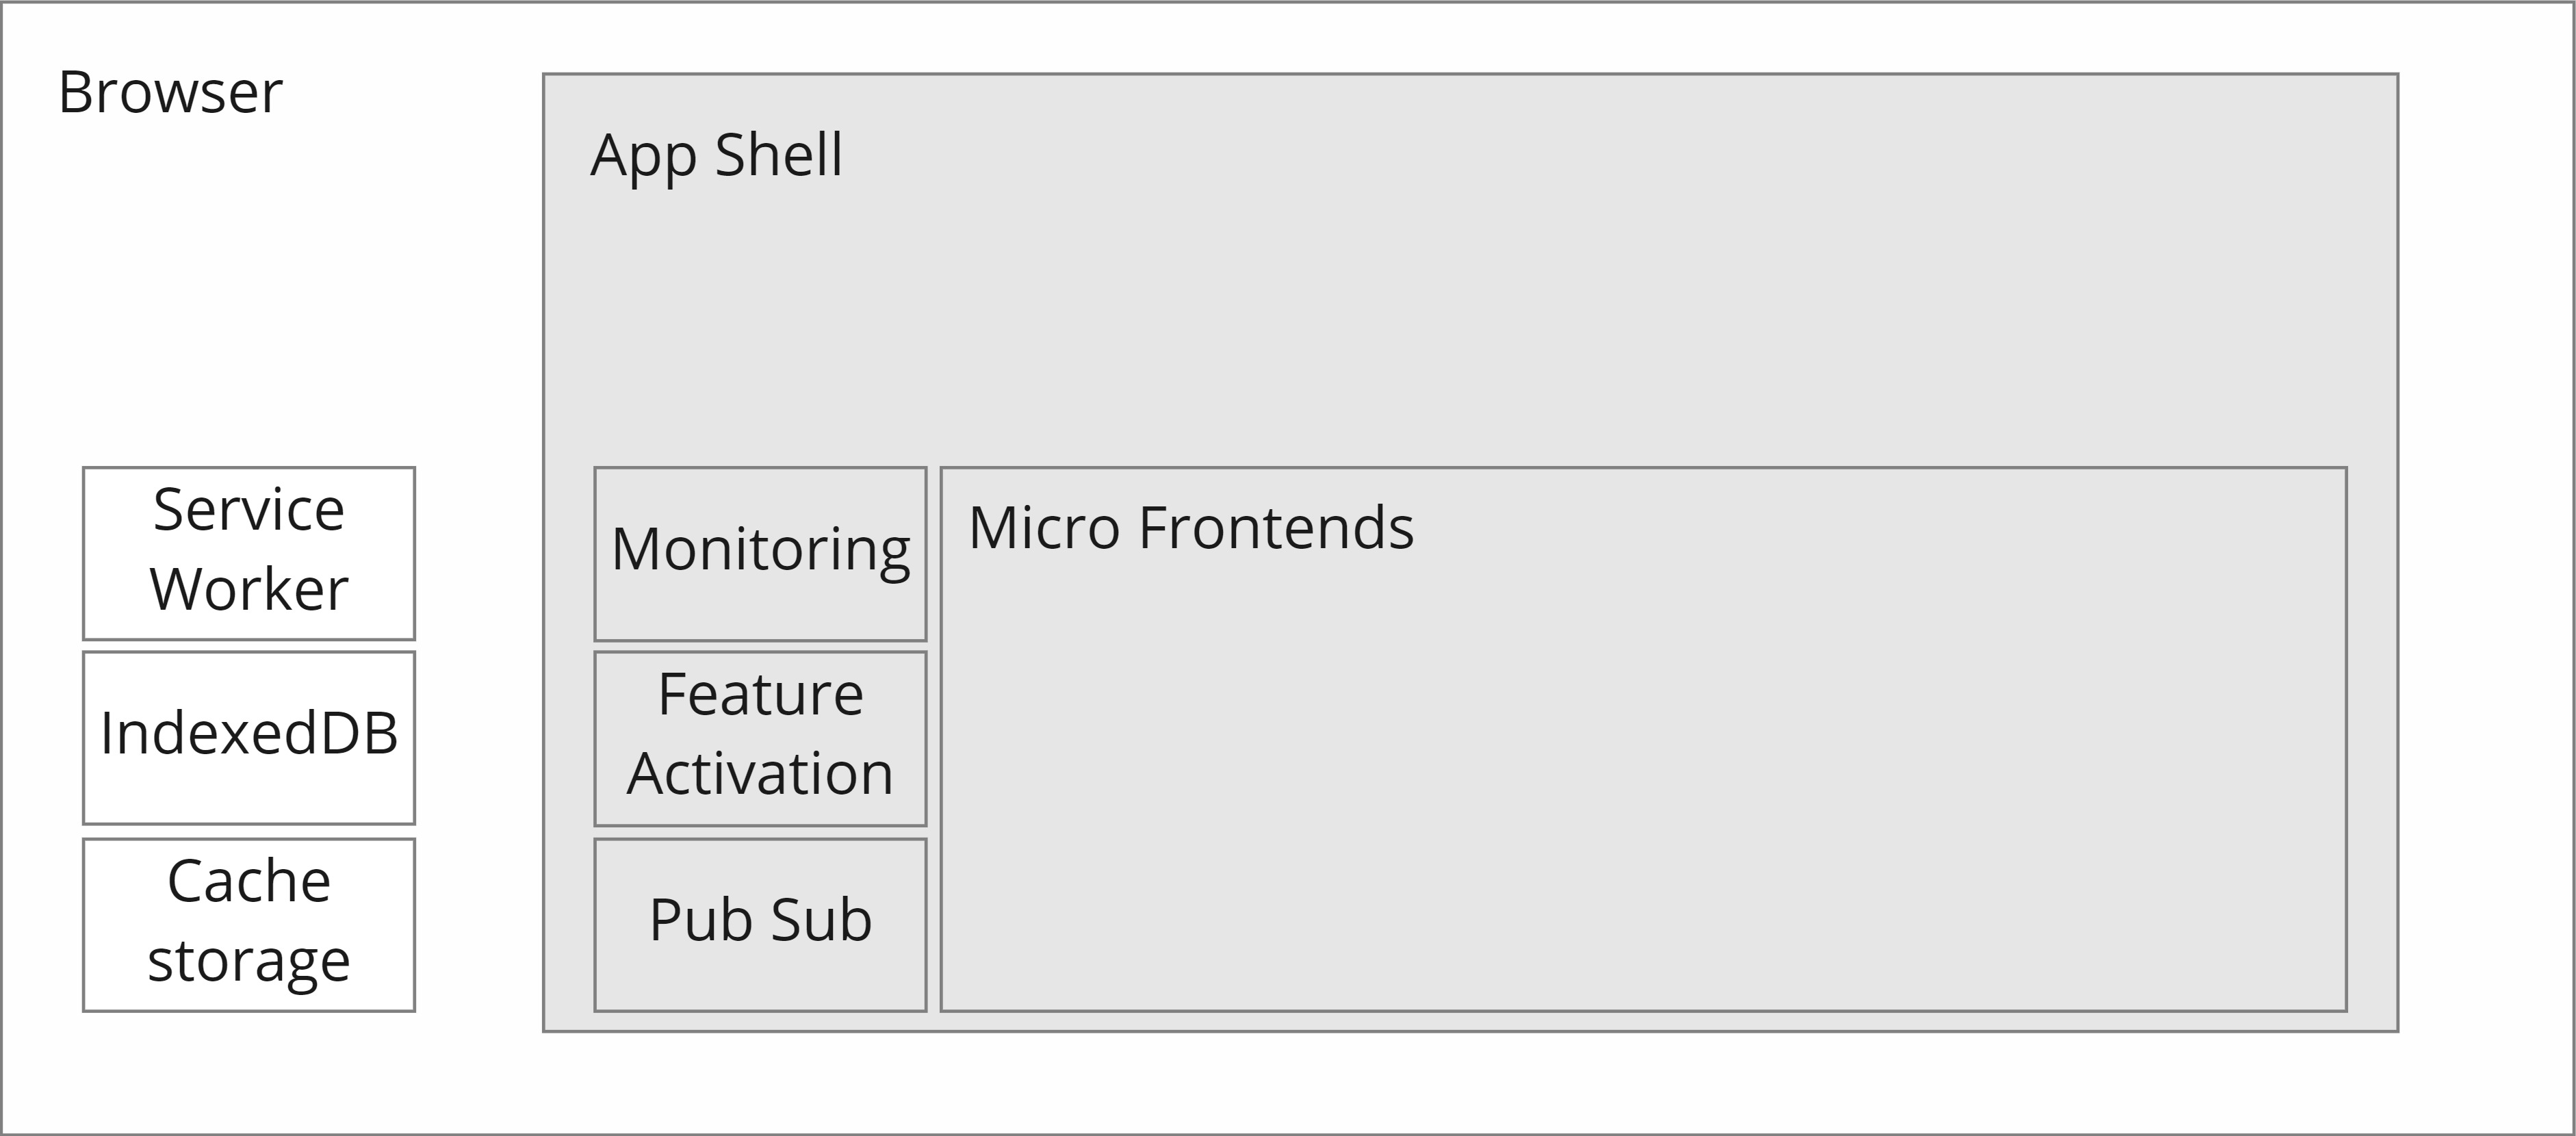
This code is very lightweight and provides only the following features out of the box:
- Monitoring: The first thing it does is to set up monitoring. I want to capture as many exceptions as possible and make them visible in my monitoring infrastructure.
- Feature Activation: The feature activation infrastruture installs the code for the capabilities into the browsers database and local storage, finally it activates the features defined in the installed code. I'll explain this part in more detail in the lifecycle section at the end of this article.
- Pub Sub: Eventhough HTML elements do have an eventing model built-in, which I use wherever I can, there is still a need to communicate non UI events to and from loaded components (e.g. when a user authenticates, or authorizes on an organization, etc..). To support this need I have a little in memory pub sub system built into the shell.
This shell does not come with any visual elements, it's invisible, so it needs to be accompanied by a branding shell to deliver a nice initial experience to the user.
Branding shell
The branding shell brings in the visual elements for the app shell. This branding shell is a separate package, dependent on the infrastructure shell, containing shared HTML, CSS and image assets plus some common web components (e.g. datepicker, buttons, etc...).

All apps in the clubmanagement suite are sharing the same branding shell and therefore look the same. The club specific sites have their own branding shell, but do share the infrastructure shell. This allows the use of certain capabilities branded either as ClubManagement or as a specific club, without having to rewrite them.
Capabilities
Unless it's a pure content based app, the shell does not bring much value on it's own. It needs to load additional capabilities into the app to make it richer.
As I already covered in the composite UI article, the ClubManagement system is divided into business capabilities which each expose one or more packages containing web components. These packages are downloaded through the Yarn package manager and included as input to a custom static site generator.
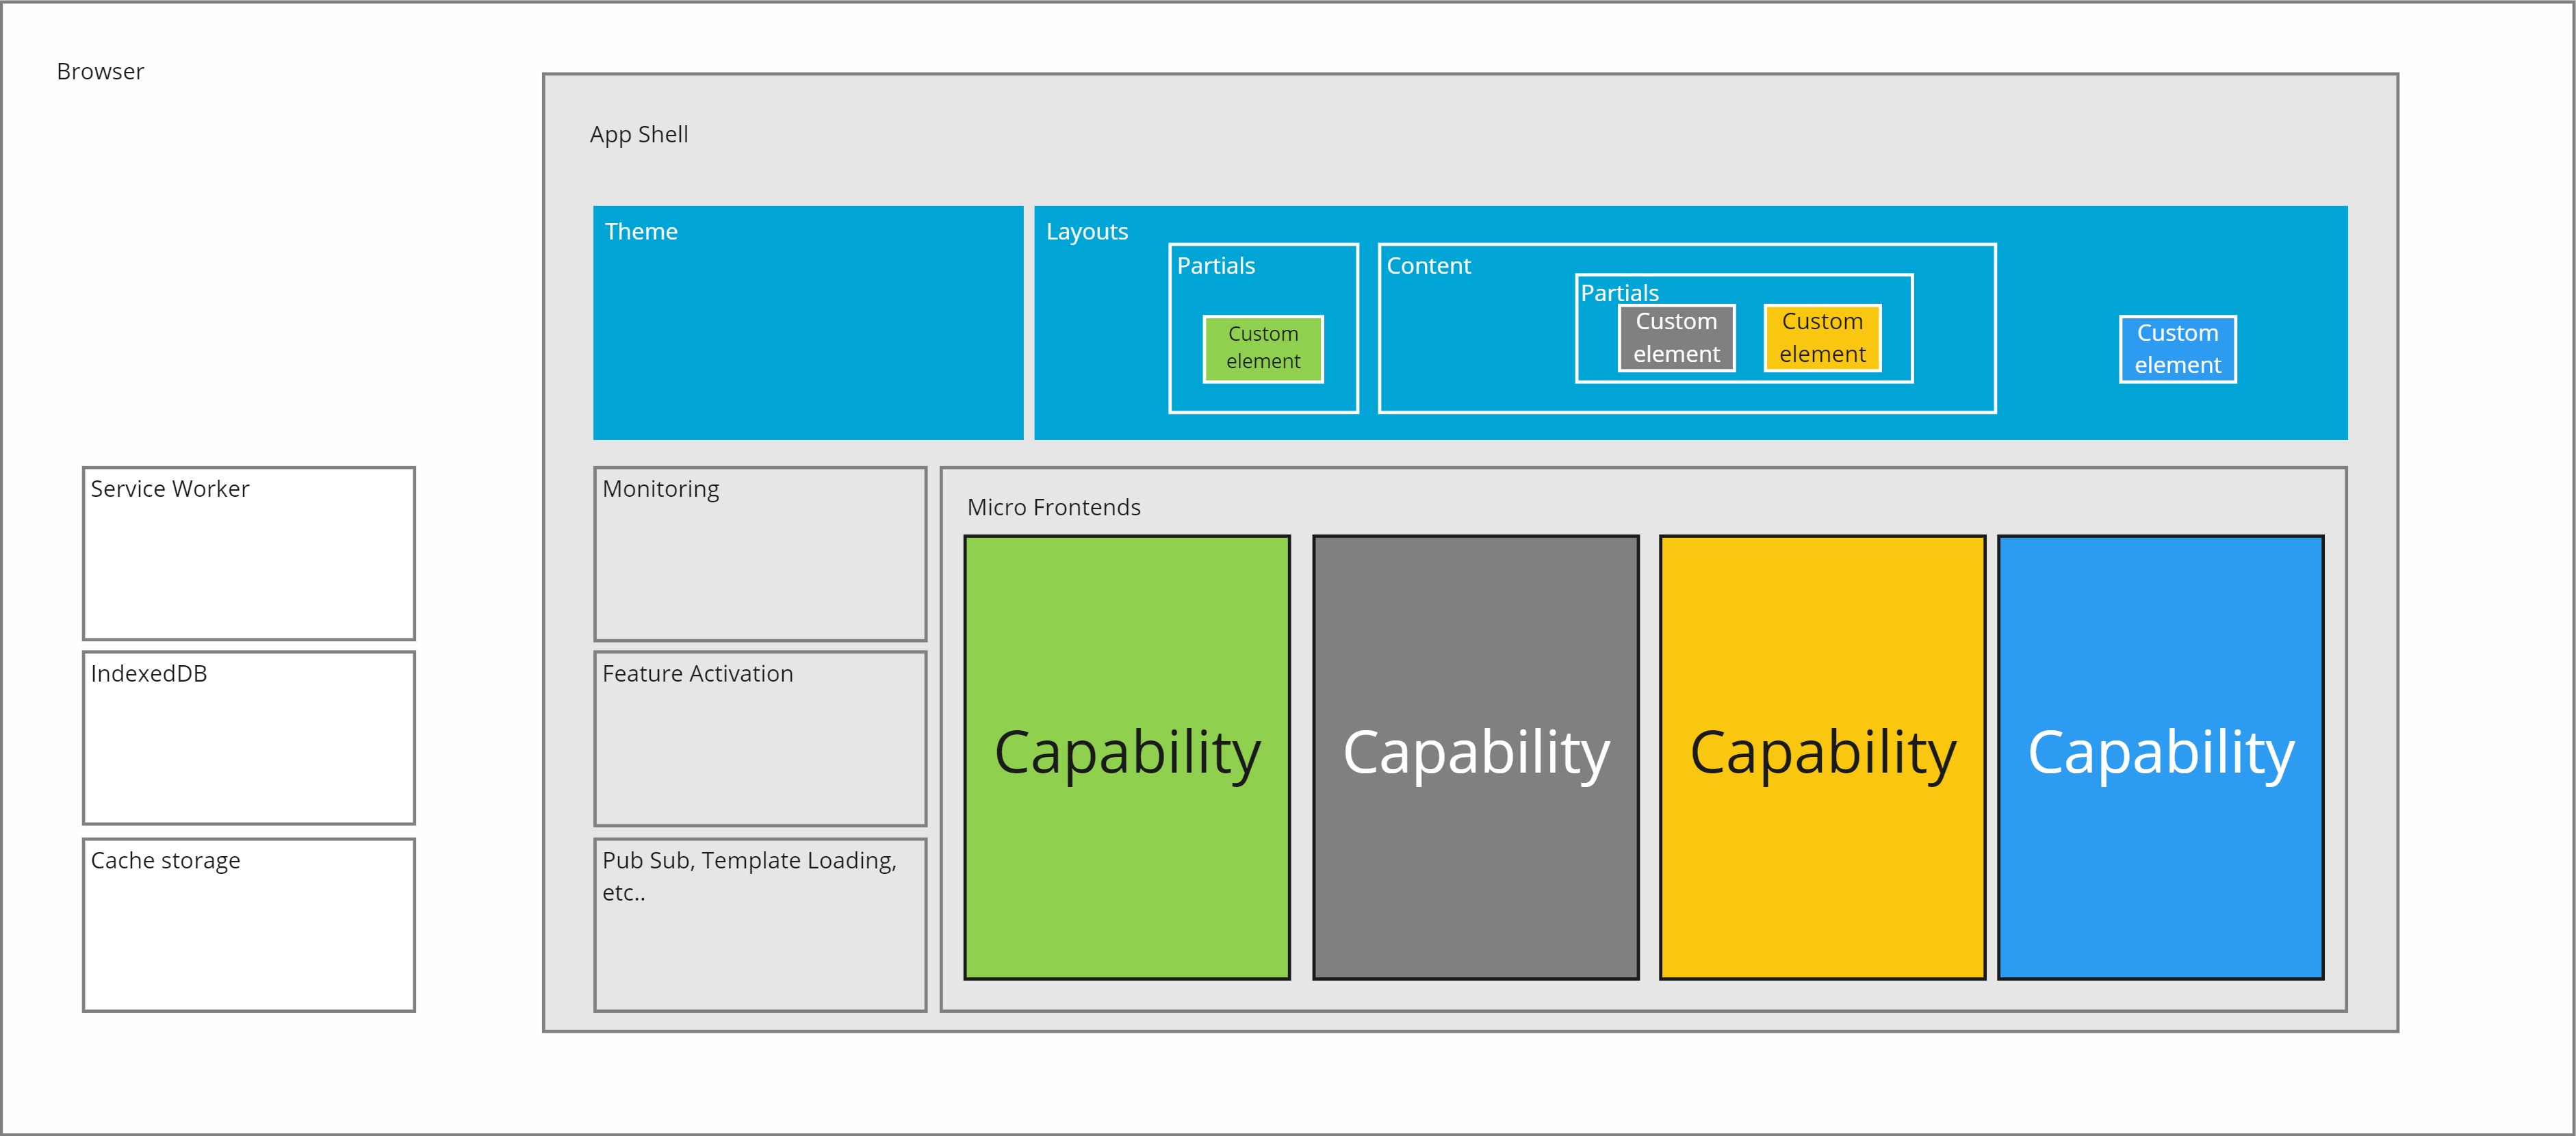
Web components don't magically work however, they need to be registered at runtime. Therefore these packages also contain code to register themselves as a Micro Frontend into the shell. These Micro Frontends will be invoked both from the Service Worker as well as on page load to respectively install their files and register their web components.
Lifecycle
The lifecycle for these Micro Frontend looks like this:
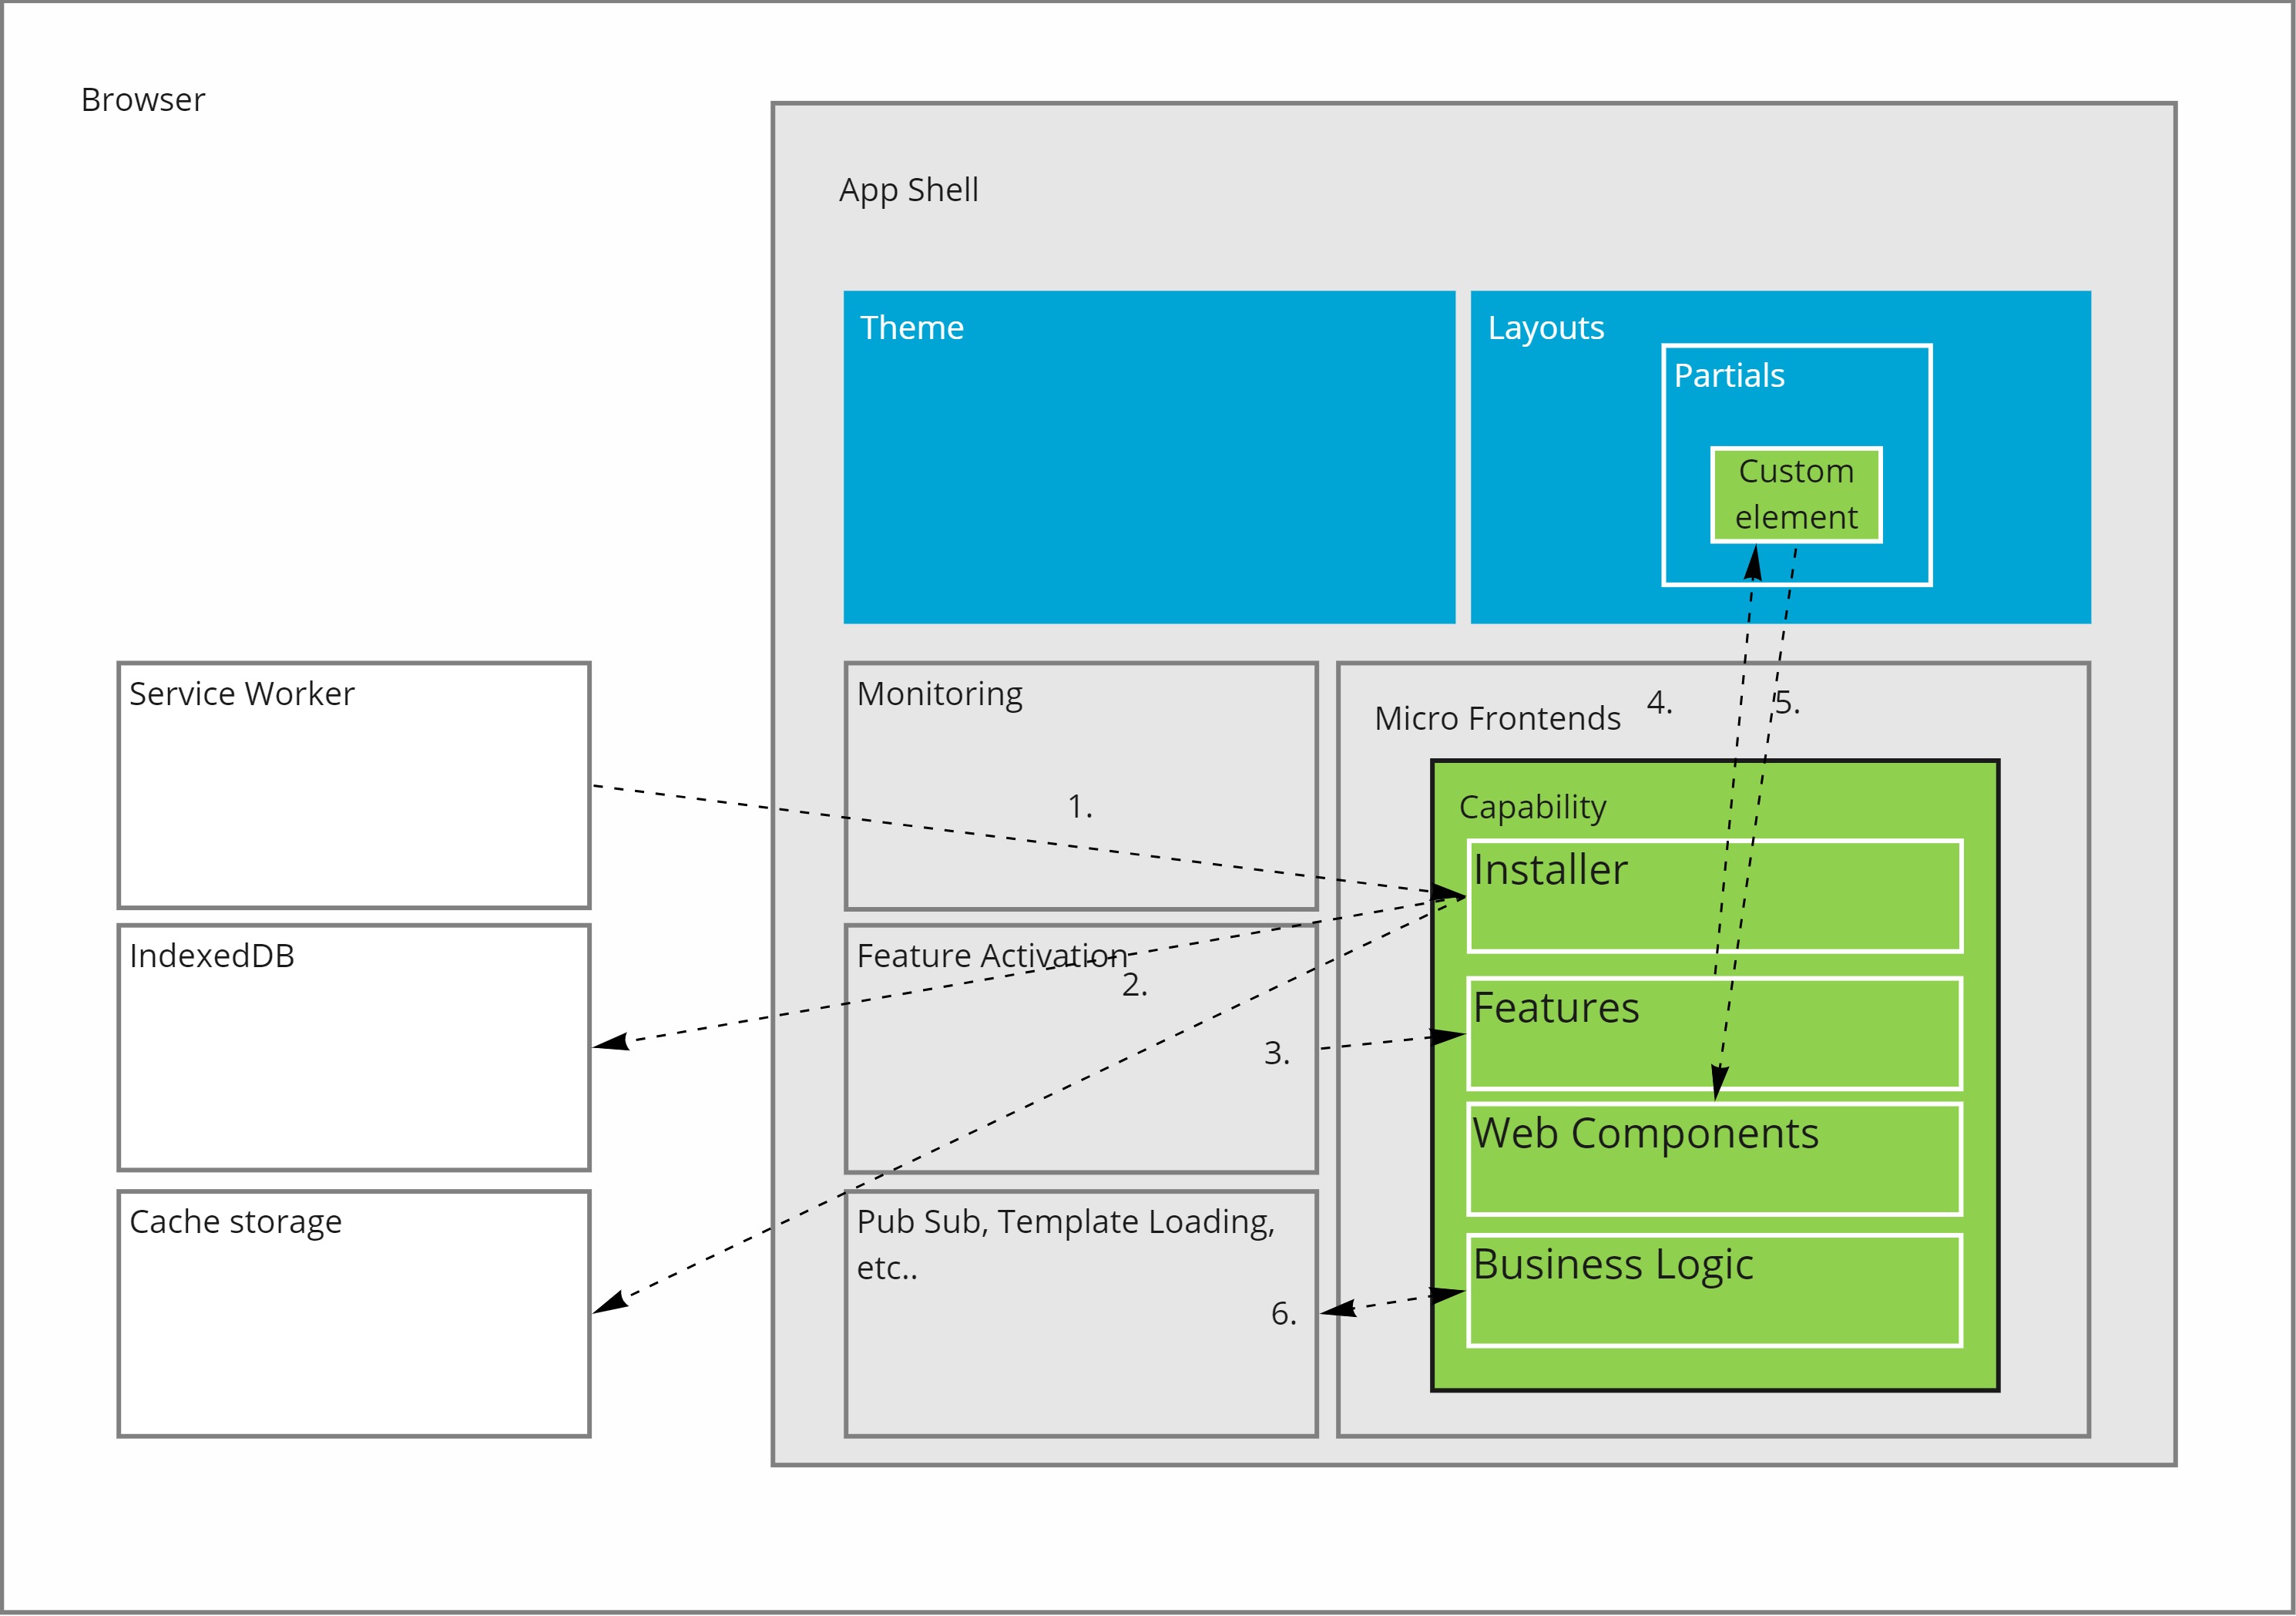
- For each registered Micro Frontend, the Service Worker will call an installer. This class will install all the files that are contained in the capability. The Service Worker will start serving those files from local storage instead of downloading them from the network. This ensures a snappy experience for all pages of the app as they all will be downloaded up front into local storage.
- The installer will put the file content in local storage and register the metadata in Indexeddb. The metadata contains versioning information that will be used to update the file content whenever new versions of that file become available. All of this happens in the Service Worker, so it's outside the scope of a specific page.
- On page loaded the shell will call into the Micro Frontends initialization code. In this initialization code it will register Feature classes and set up any database infrastructure it may need.
- The shell may use feature toggles to enable or disable certain features. When a feature is active though, it can define the custom elements for one or more of the web components contained in the capability.
- When a custom element gets defined, the browser will invoke the web components callback code.
- This code can the make use of the pub sub infrastructure, or the libraries shipped with either the shell or the capability, and render the proper HTML.
Back to guide
This article is part of the building offline progressive web apps guide. Return to this guide to explore more aspects of building offline progressive web apps.


