As usage of your software grows, so does the impact of releasing new features.
New features can have both a good and bad effect on the software and its users, the more users there are, the bigger the impact.
Over time the risk of deploying new features increases and as a result the organization becomes more and more risk averse.
Most organizations respond to this risk by introducing:
- More planning overhead
- More pre-production environments
- More testing overhead
- Less frequent releases
And as a result, less agility.
But did you know that there is a better way instead of trying to prevent the risk?
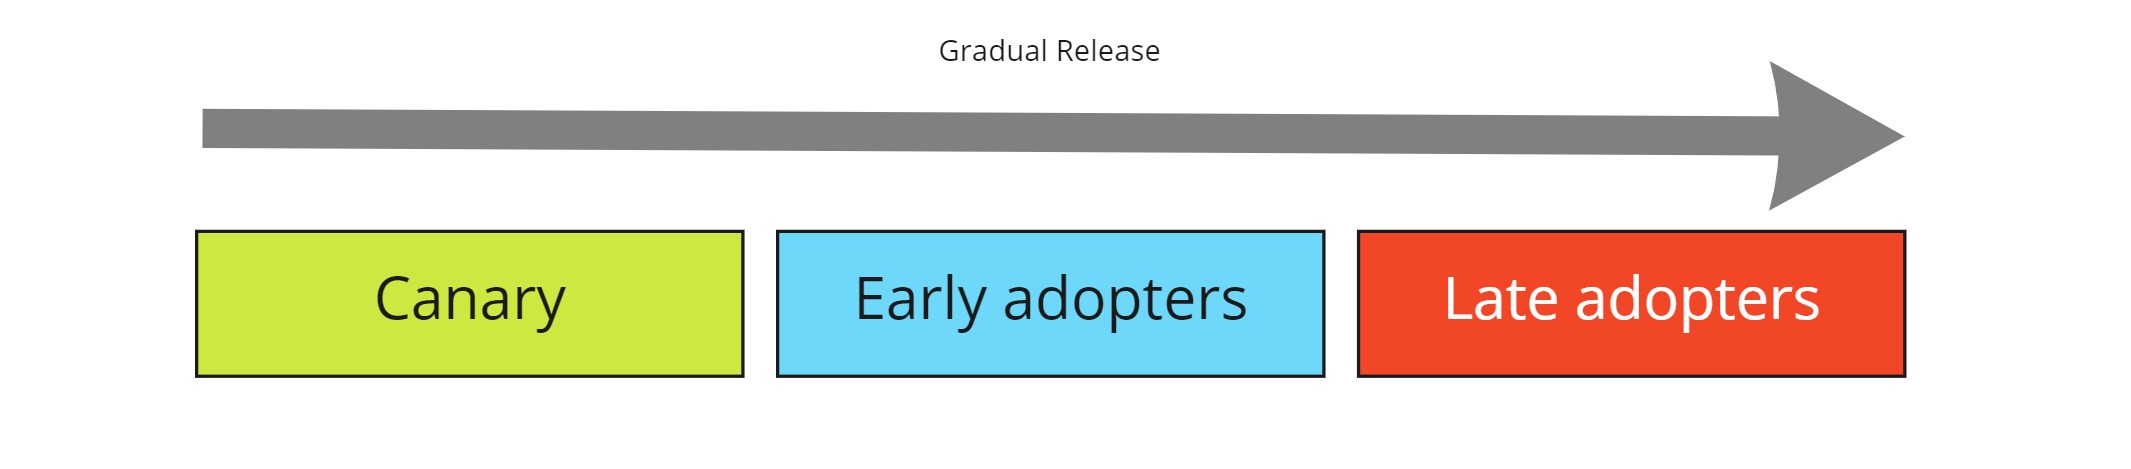
Gradual release
The trick is to decouple the deployment of a feature from its release.
You can limit the impact of a feature by gradually making it available to more and more people.
At ClubManagement we release features in the following order:
- First to a handfull of canary (in the coal mine) users
- Then to all users of the clubs that are identified as early adopters
- Finally everyone else
Gradual release can be achieved by using centrally managed, contextual, feature flags.
Contextual feature flags
Contextual implies that the feature flags are on for some people, but not for others... it depends on their context.
In the past I've already discussed how clubmanagements client side framework defines features and feature flags, in the remainder of this post we'll look at how to extend this infrastructure to make those features dependent on context as well as centrally managed.
Features and toggles
But first a quick recap of the basic elements of the client side feature infrastructure.
The basic idea is that a feature is responsible for defining a set of web components.
import { GroupSelector } from "./coordination/components/group-selector.js";
import { RoleSelector } from "./coordination/components/role-selector.js";
import { SegmentSelector } from "./coordination/components/segment-selector.js";

class CoordinationSelectorFeature{

 constructor(){
  this.name = "Coordination Selector Feature"

  this.isActive = false;
 }

 activate(){
  if(this.isActive){
   customElements.define('group-selector', GroupSelector);
   customElements.define('segment-selector', SegmentSelector);
   customElements.define('role-selector', RoleSelector);
  }
 }
}
If the feature is not active, the web components won't be defined, which will cause the browser not to attach them to the DOM and no client side code will be invoked.
Then there are feature toggles that can iterate the feature list and activate or deactivate any of the features as they see fit.
import shell from "./dish.shell.js";

class CoordinationSelectorToggle{
 async toggle(features){
  var featureName = "CoordinationSelectorFeature";
  var selectorFeature = features.find(f => f.constructor.name == featureName);
  selectorFeature.isActive = true;
 }
}

shell.featureToggles.push(new CoordinationSelectorToggle());
Centralizing management
To centralize feature management, Microsoft offers the Azure App Configuration service.
Next to configuration settings, this service also allows you to manage feature flags.
It may sound great that this service has two functions, but it really isn't.
It basically makes all of the front end SDKs unusable, as you really don't want tech savvy users of your app to be able to read all of your server side configuration settings (which may embed some sensitive data) in exchange to getting a feature flag.
This leaves you with only the option to build an api and control the feature flag information exposed.
Configure an API with the feature flag SDK
In order to integrate Azure App Configuration into your aspnet api you'll need to add the following packages:
> Install-Package Microsoft.Extensions.Configuration.AzureAppConfiguration
> Install-Package Microsoft.FeatureManagement.AspNetCore
Integrating app configuration service into the dotnet configuration infrastructure requires you to add it as part of the host builder setup in program.cs (prior to the startup logic).
A connectionstring towards the configuration service must be loaded locally without having access to the configuration infrastructure as you're still configuring it.
An environment variable will suit this purpose.
Note that you probably want to configure it to only load values labelled for a specific environment.
Care must be taken to ensure that both the regular configuration and the feature flag configuration are configured individually (this wasted quite some of my time to be honest).
public class Program
{
 public static void Main(string[] args)
 {
  CreateHostBuilder(args).Build().Run();
 }

 public static IHostBuilder CreateHostBuilder(string[] args) =>
  Host.CreateDefaultBuilder(args)
      .ConfigureWebHostDefaults(webBuilder => {
        webBuilder.ConfigureAppConfiguration((hostingContext, config) =>
  {
   var connectionString = Environment.GetEnvironmentVariable("CUSTOMCONNSTR_configurationservice");
   config.AddAzureAppConfiguration(options =>
   {
    options.Connect(connectionString)
    // Load configuration values with no label
    .Select(KeyFilter.Any, LabelFilter.Null)
    // Override with any configuration values specific to current hosting env
    .Select(KeyFilter.Any, hostingContext.HostingEnvironment.EnvironmentName)
    // Feature flag label must match environment
    .UseFeatureFlags(featureFlagOptions => {
      featureFlagOptions.Label = hostingContext.HostingEnvironment.EnvironmentName;
    });
   });
  });
  webBuilder.UseStartup<Startup.Startup>();
 });
}
Aspnet requires middleware configured in Startup.cs to add configuration and feature management instances into the ioc container and make them available to the request processing pipeline.
public void ConfigureServices(IServiceCollection services)
{
 services.AddAzureAppConfiguration();
 services.AddFeatureManagement()
         // makes it contextual, more on this later
        .AddFeatureFilter<ProfilesFeatureFilter>();

 // ...
}
public void Configure(IApplicationBuilder app, IWebHostEnvironment env)
{
 // ...
 app.UseAzureAppConfiguration();
 // ...
}
Expose feature flags through the api
Now that aspnet has been configured with the configuration service and feature management extensions, we can start to use them to expose the feature flags to the client app.
In this case a dedicated controller has been set up to do so.
The controller requires authorization so that it know who is requesting the flag.
The profile information is passed into the feature manager (part of the aspnet package included earlier) and out comes a boolean indicating wether the feature is enabled or not.
[Route("featureflags")]
public class FeatureFlagsController : Controller
{
 private readonly IFeatureManager _featureManager;

 public FeatureFlagsController(IFeatureManager featureManager)
 {
  this._featureManager = featureManager;
 }

 [HttpGet("{feature}")]
 [Authorize]
 public async Task<IActionResult> Get([FromRoute] string feature)
 {
  var profileId = User.Claims.FirstOrDefault(c => c.Type == JwtClaimTypes.Id)?.Value;

  var isEnabled = await _featureManager.IsEnabledAsync(feature, new FeatureContext
  {
    ProfileId = profileId
  });

  return Ok(new
  {
    Enabled = isEnabled,
  });
 }
}
Client side feature flags proxy
On the client side, a proxy class is in charge to send authorized GET requests to the controller and return the result of its evaluation.
import authentication from "../clubmanagement.authentication.app.js";
import config from "./config.js";

class FeatureFlags{

 async get(feature){

  var uri = config.service + "/featureflags/" + feature;
  var request = await fetch(uri, {
      method: "GET",
      mode: 'cors',
      headers: {
       "Content-Type": "application/json",
       "Authorization": "Bearer " + authentication.getAccessToken()
      }
    });
  return await request.json();
 }
}

export default new FeatureFlags();
Ugrading the toggle
And now we are back full circle at the feature toggle class.
It can use the proxy class to request to the API wether a specific feature is enabled or not.
If it is, it can look up the feature and activate it.
import shell from "./dish.shell.js";
import featureflags from "./featureflags.js";

class CoordinationSelectorToggle{

 async toggle(features){
  var featureName = "CoordinationSelectorFeature";
  var flag = await featureflags.get(featureName.toLowerCase());
  var selectorFeature = features.find(f => f.constructor.name == featureName);
  selectorFeature.isActive = flag.enabled;
 }

}

shell.featureToggles.push(new CoordinationSelectorToggle());
Making feature flags contextual
Now that you've enabled the client to use feature flags, it's time to make the flag contextual.
Features are made contextual by adding feature filters to the evaluation infrastructure.
Feature filters
These filters have a name, specified in FilterAlias. When this name is present in the condition section of a feature flag definition, the filter will be called.
[FilterAlias("ProfilesFilter")]
public class ProfilesFeatureFilter : IContextualFeatureFilter<FeatureContext>
{
 public Task<bool> EvaluateAsync(FeatureFilterEvaluationContext featureFilterContext, FeatureContext featureContext)
 {
   var settings = ConfigurationBinder.Get<ProfilesFilterSettings>(featureFilterContext.Parameters);

   return Task.FromResult(settings.EnabledFor.Contains(featureContext.ProfileId));
 }
}
The filter gets passed in a custom context object, which comes from the context object passed into the IsEnabledAsync operation of the SDK.
public class FeatureContext
{
 public string ProfileId { get; set; }
}
Next to the context it also gets access to the FeatureFilterEvaluationContext which contains the centrally configured parameters.
These parameters must be cast to a well known schema before being used to be evaluate the context.
public class ProfilesFilterSettings
{
  public string[] EnabledFor { get; set; }
}
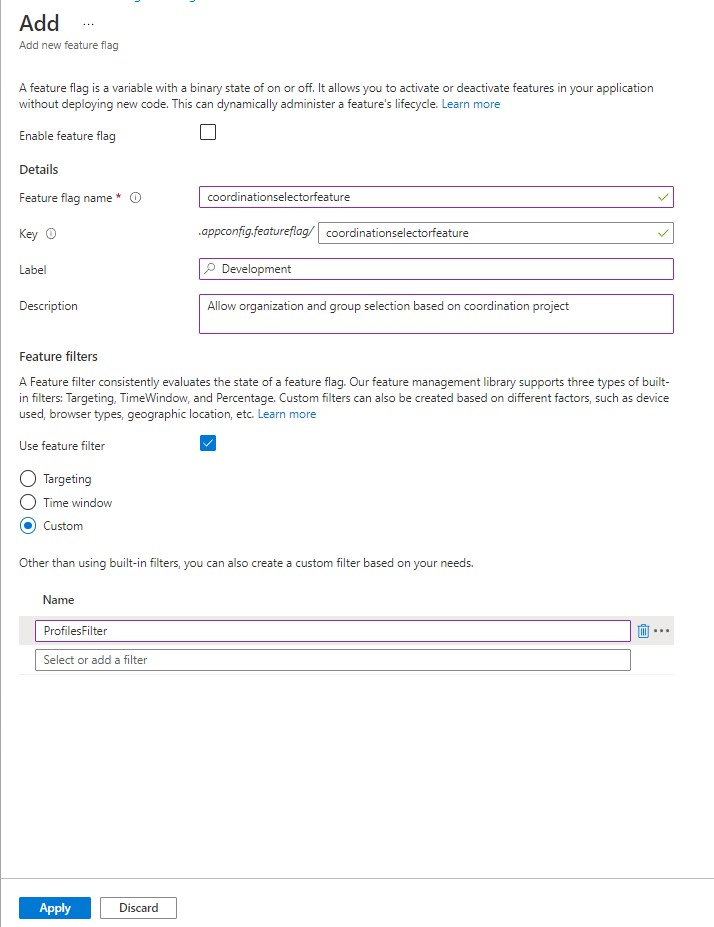
Configuring the client filter
The settings object needs to have the same schema as the object set to the parameters property, and have the same name as the filter alias, in the client_filters condition of the feature flag.
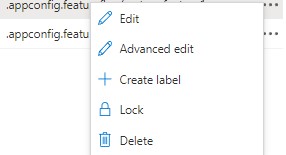
To edit this data structure, you can to use the advanced edit feature in the azure portal.
{
 "id": "coordinationselectorfeature",
 "description": "",
 "enabled": true,
 "conditions": {
  "client_filters": [
  {
   "name": "ProfilesFilter",
   "parameters": {
    "EnabledFor": [
      "39ecd2d1-91cb-48cf-b356-03291a67a9b8"
     ]
   }
  }]
 }
}
Other filters
In the code above, I'm only showing the code for a ProfilesFeatureFilter, which allows to expose the feature to the canary users.
To broaden the scope to the early adopter clubs, there is a similar OrganizationsFeatureFilter. But I've omitted that code from the article to keep it as brief as I could.
And ofcourse, to open up the feature to everyone, all that needs to be done is remove the client_filter condition.
Wrapup
Gradual release, using contextual feature flags, has become a corner stone of my development cycle.
It allows me to work on documentation and educational content, instead of responding to users, after a deployment.
While the content progresses I can enable a feature for more and more people and deal with their questions and concerns when I actually have time for it.
Next to the benefits for gradual release, this feature also allows for other pracices, such as A/B testing or feature reduction in the face of outages.
But those are topics for another day...


